- Posts: 4566
- Thank you received: 323
- Forum
- Open Forum
- Miscellaneous Research Topics
- General Airfield or 20th Century Military Architecture Discussion Topics
- 200 yard Moving Target Ranges
200 yard Moving Target Ranges
- P Bellamy
-

- Offline
- Platinum Member
-

Less
More
02 Apr 2010 21:02 #151
by P Bellamy
Paul Bellamy
Replied by P Bellamy on topic 200 yard Moving Target Ranges
Paul Bellamy
Please Log in or Create an account to join the conversation.
- PETERTHEEATER
-

- Offline
- Platinum Member
-
Less
More
- Posts: 10905
- Thank you received: 772
03 Apr 2010 06:29 #152
by PETERTHEEATER
Replied by PETERTHEEATER on topic 200 yard Moving Target Ranges
Aah. I found this video a very long time ago but couldn't get it to run. I then forgot about it!
Thanks Paul, I have now left it to 'load' for as long as it takes - which is a long time - and see what I can see.
EDIT: No luck in getting it to run smoothly just gives two second grunts then takes five seconds to show the next two seconds this after letting the whole thing download. Anyway, I get the picture so to speak. Interesting are the shots 'inside' the target shelter showing details of the models and the foot control. Presumably, the two dials in front of the operator shown the position of the target on the circuit. Despite the ET protection and the fact that the target shelter 'doors' are at 90 degrees to the line of shoot, they have had to put up a sandbag wall to shield the operator from ricochets!
Thanks Paul, I have now left it to 'load' for as long as it takes - which is a long time - and see what I can see.
EDIT: No luck in getting it to run smoothly just gives two second grunts then takes five seconds to show the next two seconds this after letting the whole thing download. Anyway, I get the picture so to speak. Interesting are the shots 'inside' the target shelter showing details of the models and the foot control. Presumably, the two dials in front of the operator shown the position of the target on the circuit. Despite the ET protection and the fact that the target shelter 'doors' are at 90 degrees to the line of shoot, they have had to put up a sandbag wall to shield the operator from ricochets!
Please Log in or Create an account to join the conversation.
- carnaby
-
 Topic Author
- Offline
- Platinum Member
-
Less
More
- Posts: 5026
- Thank you received: 440
03 Apr 2010 10:04 #153
by carnaby
Plan A is always more effective when the problem you are working on understands that Plan B will involve the use of dynamite
Replied by carnaby on topic 200 yard Moving Target Ranges
"
Track Target for Air Gunners
"
There seems no way to save this clip. Can't find it in any cache, and Orbit Grab downloader doesn't save it. Clicking on it a second time just sets it downloading again.
Pity, as I'd like to study bits over and over - but I guess that's copyright.
Graham
There seems no way to save this clip. Can't find it in any cache, and Orbit Grab downloader doesn't save it. Clicking on it a second time just sets it downloading again.
Pity, as I'd like to study bits over and over - but I guess that's copyright.
Graham
Plan A is always more effective when the problem you are working on understands that Plan B will involve the use of dynamite
Please Log in or Create an account to join the conversation.
- Movingtarget
-
- Offline
- Administrator
-

Less
More
- Posts: 63
- Thank you received: 8
13 Apr 2010 13:10 #154
by Movingtarget
Replied by Movingtarget on topic 200 yard Moving Target Ranges
Just seen these posts, excellent!
Looking at the "Stills" on the BritishPathe website (set to one second) shows quite a lot of detail - the inside of the target shelter is different to what I imagined.
As to where - obviously near an airfield which cuts a few locations out, my suggestion is Hell's Mouth, but I'll need to check with my site plans. HM had 3 Bellman's in an "L" shape and the turret hardstanding/workshop (that can be seen in the stills) was near the hangers.
Has anyone contacted British Pathe about the clip ? If not, I may do so.
I visited the site at Skipsea last week. Not much remaining but I'll post some photos as soon as I can.
JohnG
Looking at the "Stills" on the BritishPathe website (set to one second) shows quite a lot of detail - the inside of the target shelter is different to what I imagined.
As to where - obviously near an airfield which cuts a few locations out, my suggestion is Hell's Mouth, but I'll need to check with my site plans. HM had 3 Bellman's in an "L" shape and the turret hardstanding/workshop (that can be seen in the stills) was near the hangers.
Has anyone contacted British Pathe about the clip ? If not, I may do so.
I visited the site at Skipsea last week. Not much remaining but I'll post some photos as soon as I can.
JohnG
Please Log in or Create an account to join the conversation.
- carnaby
-
Topic Author
- Offline
- Platinum Member
-
Less
More
- Posts: 5026
- Thank you received: 440
13 Apr 2010 19:40 #155
by carnaby
Hardstanding said
Graham
Plan A is always more effective when the problem you are working on understands that Plan B will involve the use of dynamite
Replied by carnaby on topic 200 yard Moving Target Ranges
My feeling is not - the technology required in those days would be a bit advanced to do this. Might be wrong though - the simulator designers were very innovative. In which case what do they show - speed?, volts / amps? don't know.Presumably, the two dials in front of the operator shown the position of the target on the circuit.
Hardstanding said
That was my second choice - I suspect the additional wall here is possibly just in shot....my suggestion is Hell's Mouth, but I'll need to check with my site plans. HM had 3 Bellman's in an "L" shape and the turret hardstanding/workshop (that can be seen in the stills) was near the hangers
Graham
Plan A is always more effective when the problem you are working on understands that Plan B will involve the use of dynamite
Please Log in or Create an account to join the conversation.
- P Bellamy
-
- Offline
- Platinum Member
-
Less
More
- Posts: 4566
- Thank you received: 323
13 Apr 2010 20:29 #156
by P Bellamy
Paul Bellamy
Replied by P Bellamy on topic 200 yard Moving Target Ranges
Viewing the stills set at 1-second intervals, the additional wall is clearly visible at 00:00:46.
The manual switching lever for the points is shown nicely at 00:00:21.
I've been trying to figure out the arrangement of the Repair Shed, here's a couple of SketchUp screenshots so far:
This image is hidden for guests.
This image is hidden for guests.
To keep up my Anorak Quota, the telephone setup visible in the film is a Type 4 or 150 Candlestick phone, with a Type 25 or 26 Bellset mounted on the pillar.
TTFN,
PB
The manual switching lever for the points is shown nicely at 00:00:21.
I've been trying to figure out the arrangement of the Repair Shed, here's a couple of SketchUp screenshots so far:
This image is hidden for guests.
Please log in or register to see it.
This image is hidden for guests.
Please log in or register to see it.
To keep up my Anorak Quota, the telephone setup visible in the film is a Type 4 or 150 Candlestick phone, with a Type 25 or 26 Bellset mounted on the pillar.
TTFN,
PB
Paul Bellamy
Please Log in or Create an account to join the conversation.
- P Bellamy
-
- Offline
- Platinum Member
-
Less
More
- Posts: 4566
- Thank you received: 323
14 Apr 2010 17:36 #157
by P Bellamy
Paul Bellamy
Replied by P Bellamy on topic 200 yard Moving Target Ranges
The CANMORE site report on the 200yd MTR at Tain has a nice air photo showing the bombing range target, arrow and quadrant towers beside the MTR.
LINKY
All the best,
PB
LINKY
All the best,
PB
Paul Bellamy
Please Log in or Create an account to join the conversation.
- Movingtarget
-
- Offline
- Administrator
-
Less
More
- Posts: 63
- Thank you received: 8
16 Apr 2010 13:16 #158
by Movingtarget
Replied by Movingtarget on topic 200 yard Moving Target Ranges
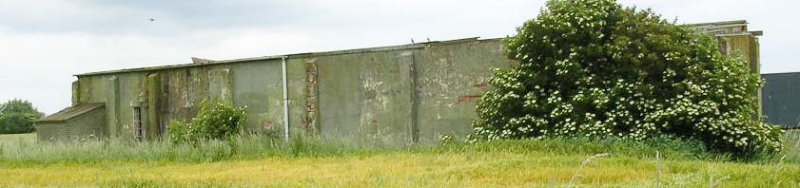
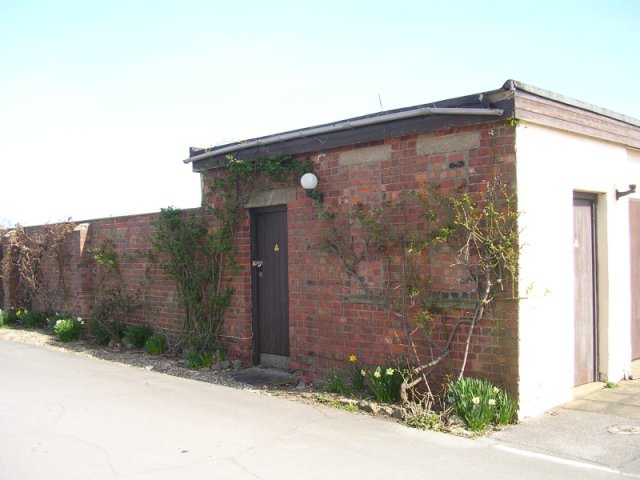
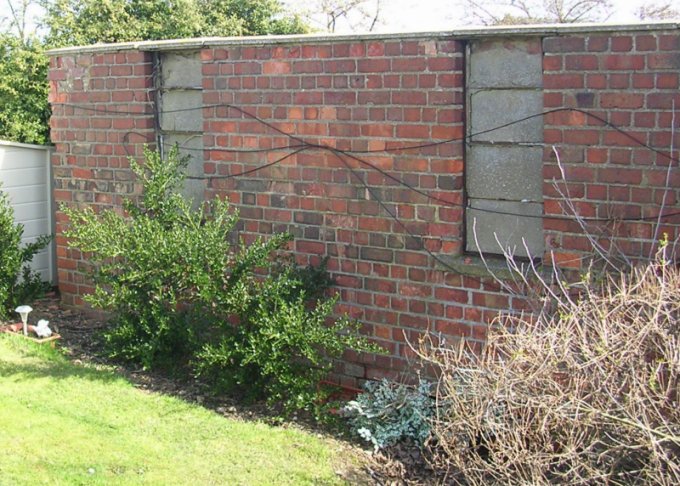
Some photos of the remaining bits of the turret workshop at Skipsea compared with the extant building at Theddlethorpe...
First, a shot of the back of the Theddlethorpe building
This image is hidden for guests.
Skipsea - southern end of the building remains showing doors in the same place as Theddlethorpe and two blocked up toilet windows (hidden by large bush in the Theddlethorpe photo). The wall pillars are in the same places as Theddlethorpe though the wall height has obviously been reduced.
This image is hidden for guests.
Opposite end of building (taken through a fence !) shows original windows still there....
This image is hidden for guests.
Finally a shot of the inside of the building - non-original floor but I wonder if the paint on the walls is original ?
This image is hidden for guests.
The workshop at Skipsea looks the same size and layout as all the others I've seen. No other walls or buildings exist as it's in the middle of a holiday park.
JohnG
First, a shot of the back of the Theddlethorpe building
This image is hidden for guests.
Please log in or register to see it.
Skipsea - southern end of the building remains showing doors in the same place as Theddlethorpe and two blocked up toilet windows (hidden by large bush in the Theddlethorpe photo). The wall pillars are in the same places as Theddlethorpe though the wall height has obviously been reduced.
This image is hidden for guests.
Please log in or register to see it.
Opposite end of building (taken through a fence !) shows original windows still there....
This image is hidden for guests.
Please log in or register to see it.
Finally a shot of the inside of the building - non-original floor but I wonder if the paint on the walls is original ?
This image is hidden for guests.
Please log in or register to see it.
The workshop at Skipsea looks the same size and layout as all the others I've seen. No other walls or buildings exist as it's in the middle of a holiday park.
JohnG
Please Log in or Create an account to join the conversation.
- P Bellamy
-
- Offline
- Platinum Member
-
Less
More
- Posts: 4566
- Thank you received: 323
16 Apr 2010 17:55 #159
by P Bellamy
Paul Bellamy
Replied by P Bellamy on topic 200 yard Moving Target Ranges
Work-in-progress of the Store Workshop building:
This image is hidden for guests.
This image is hidden for guests.
This image is hidden for guests.
Based on the Theddlethorpe photos, I wonder if the centre two bays of the turret store would originally have also been fitted with doors.
TTFN,
PB
This image is hidden for guests.
Please log in or register to see it.
This image is hidden for guests.
Please log in or register to see it.
This image is hidden for guests.
Please log in or register to see it.
Based on the Theddlethorpe photos, I wonder if the centre two bays of the turret store would originally have also been fitted with doors.
TTFN,
PB
Paul Bellamy
Please Log in or Create an account to join the conversation.
- Richard Drew
-

- Offline
- Elite Member
-

Less
More
- Posts: 1181
- Thank you received: 13
16 Apr 2010 19:07 #160
by Richard Drew
Richard
www.atlantikwall.co.uk
Replied by Richard Drew on topic 200 yard Moving Target Ranges
Richard
www.atlantikwall.co.uk
Please Log in or Create an account to join the conversation.
- Forum
- Open Forum
- Miscellaneous Research Topics
- General Airfield or 20th Century Military Architecture Discussion Topics
- 200 yard Moving Target Ranges
Time to create page: 0.062 seconds